
Hello, this is an unorganized collection of guides on how to do an assortment of random things in Adobe Illustrator. It is not a getting started guide, or a comprehensive list of possibilities. These are not necessarily the best or most efficient way to do these things, they are just the way we do them at the moment.
Adobe Illustrator is a massive program with what seems like infinite depths of menus and options. We hope this page will help at least some people figure out how to do something in Illustrator. At very least it will remind us how to certain things when we forget.
If you have any tips you would like to share, or suggestions for a better way to do these tasks in Adobe Illustrator, please let us know in the comments below! It would be much appreciated, thanks!
Table of contents:
- How to copy an object or shape.
- How to make a wavy line.
- How to hide objects not on Artboard and create a keyboard shortcut.
1) How to copy an object in Illustrator:
The first step is to select your object or shape with the Selection Tool (the shortcut is hitting the v key). Here are several copy & paste methods:
- Use the standard Ctrl + c to copy, and Ctrl + v to paste. It should be pasted in the center of your screen.
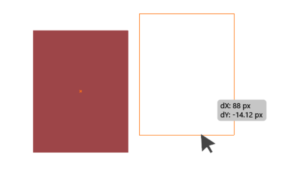
- Copy via drag: Select the object, then hold the Alt key down (or option key on Mac), then click and drag the object. A copy should appear leaving the original in place. Release the mouse button first, before releasing the Alt key, to set the copy down.
- To paste the copy in the same place as the original: use Ctrl + c to copy, and Ctrl + f to paste in place, in front. Remember f for front. Front vs Back is meant on the z-axis, layer height, into and out of the screen. The front object will show over a back object, the back object will be covered by the front object. This pastes the copy in front of the original object if it, or nothing else, is selected. If you select a different object then it will paste it in the same location as the original object but in front of the new selected object in terms of layer height.
- To paste the copy in the same place as the original: use Ctrl + c to copy, and Ctrl + b to paste in place, behind the original. Remember b for back. This pastes the copy in front of the original object if it, or nothing else, is selected. If you select a different object then it will paste it in the same location as the original object but in front of the new selected object in terms of layer height.
2) How to make a wavy line in Illustrator:
A screen shot is under step 6.
- Draw a simple straight line (really any path will work).
- With the line (or path) selected. Go to the Effect menu -> then select Distort & Transform -> then Zig-Zag…
- From the Zig-Zag pop-up menu, at the bottom, turn on Preview then, under Points select Smooth. From the Options section you can change the Size (height) and the number of ridges per segment. Under Size you can choose between Relative (heights in %) or Absolute (heights in px)
- Hit Ok and you have perfect wavy line
- If you select your wavy line you will notice that the path is still the straight line you created originally. This lets you easily extend or contract your line and the wave creation settings will update to match.
- If you want your path to follow the wavy line, so you can adjust curves manually, first select your wavy line. Then, go to the Object menu and about 1/4 of the way down select Expand Appearance. Now your path will follow your wavy line.

3) How to hide everything outside the Artboard in Illustrator: Trim View & keyboard shortcut.
Solution to hide objects that are outside the Adobe Illustrator Artboard. Use the Trim View!
- From the top menu select View
- Then select Trim View
- This should hide everything that is off of the artboard. Select it again to return to normal view. But wait there’s more!
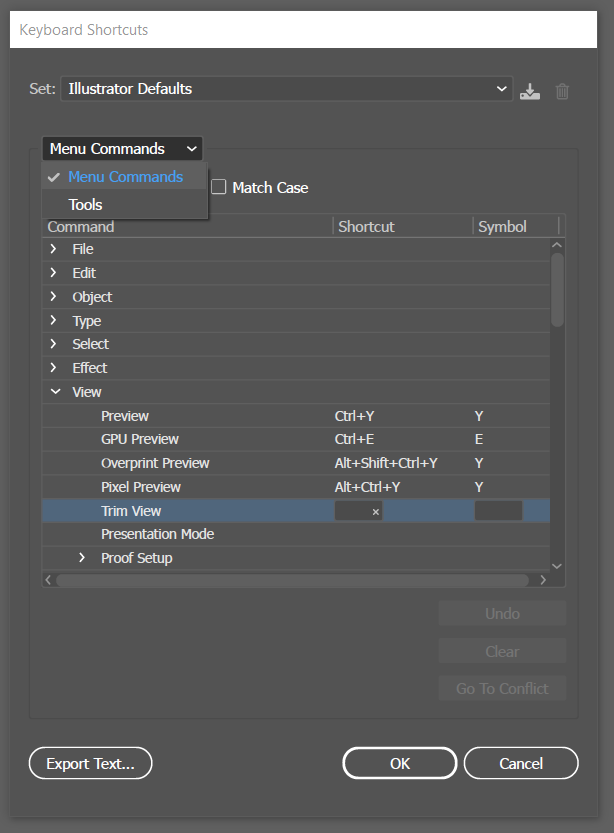
Create a custom keyboard shortcut for Trim View in Illustrator.
- Select the Edit main menu
- Go down to Keyboard Shortcuts…
- This should open the Keyboard Shortcuts popup menu. Change the second drop down menu from Tools to Menu Commands (see screenshot below)
- Under View will be Trim View option where you can set a custom keyboard shortcut
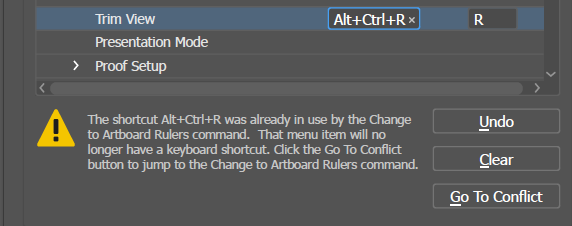
- You need to choose a shortcut that is not already used. The full list of Illustrator Default Keyboard Shortcuts is available at this link. If you try to use a shortcut that already is in use you will get a warning and can either hit the Undo or Go to Conflict buttons.
- To add a shortcut press the box in the Shortcut column and then hit your desired shortcut on your keyboard. It doesn’t always work first try.
- We went with Alt + Ctrl + D for our shortcut. Think of it as toggling Default View if that helps you remember.
That’s all, for now!
We will keep updating this page with new guides, tips and tricks.
Please drop a comment below if you have a better way to do one of these things or you know a cool trick we should add to this list of Adobe Illustrator how-to guides!
Happy drawing!