
Now that you have WordPress installed let’s do some security upgrades to keep the hackers and bad bots out!
This guide is for those who have WordPress installed already. If you are starting from the beginning, head over to our guide on How to Setup WordPress from Scratch.
We know the excitement that happens right after setting up WordPress on a new website. You want to jump right in and start building your beautiful new site. We get that, we really do, but we suggest setting up security measures first for three main reasons:
First, because you don’t want to spend hours building a website just for it to get hacked.
Second, some security updates can cause problems with certain setups and server configurations so it’s better to run into these problems when there’s no content at risk.
Third, search engines and browsers don’t like to take visitors to websites that don’t have some of these security features because the site could expose the visitor’s computer to higher risks than usual.
Contents Covered:
- Hide Author Username Slug
- Add An SSL Certificate
- Set WordPress Address To https
- SFTP or FTP access
- Set WordPress Admin Area To https With wp-config.php Update
- Force https With .htacess File Update
- All In One WP Security & Firewall Plugin Setup
- Other Plugin Recommendations
Hide Author Username Slug
WordPress by default makes an Author Page for each of your users – available at yourdomain.com/author/your-username
This page can easily be found by hackers and it means they have your exact username and are half way to breaking into your website, now they only need to use a bot to guess at your password.
Instead, we can use a simple plugin to hide our real username and only show a nickname. Later we can automatically ban anyone who tries to login to our website using this nickname in the username field because we know they are trying to break in.
From our example, yourdomain.com/author/your-username the your-username part of the URL is called a Slug, this is what we will change so it doesn’t show our username anymore.
Time to add your first WordPress Plugin.
From the left-side menu click on Plugins and you probably have the Askimet Anti-Spam and Hello Dolly plugins installed by default. We always delete these first thing.
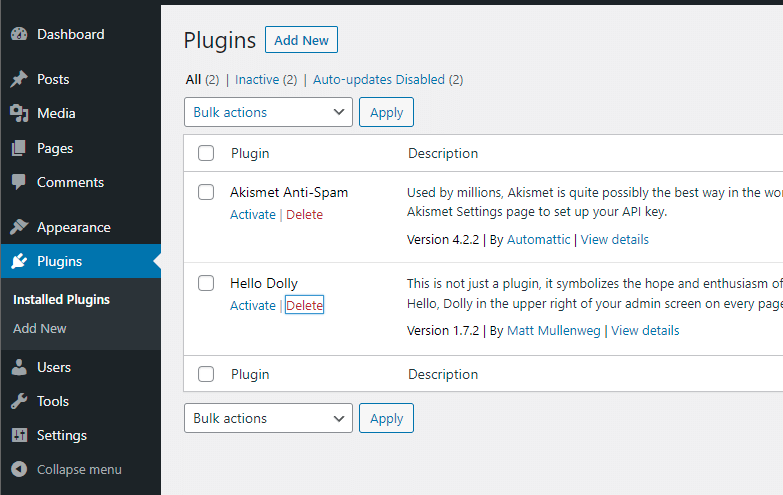
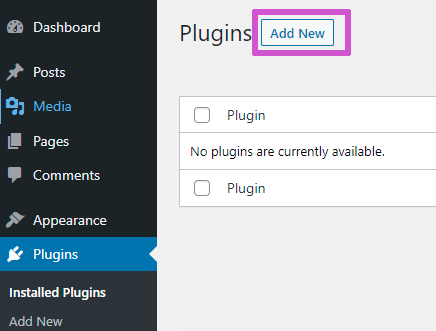
Now, with that clutter removed, hit the Add New button.
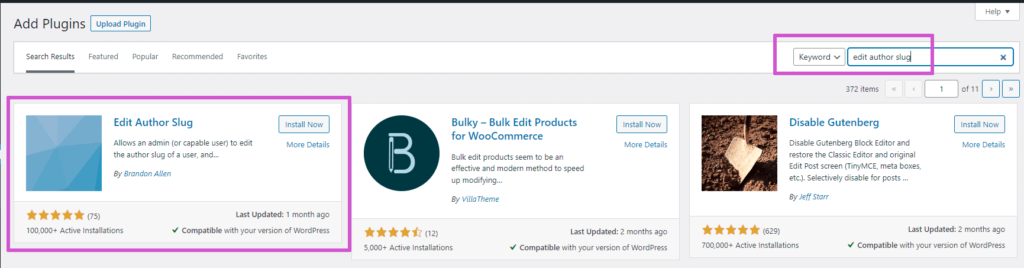
From the top right search for “edit author slug” and install the Edit Author Slug plugin by Brandon Allen. Once it’s installed, the Install Now button will change to an Activate button, hit this too.
From the Users section of the left-hand menu in WordPress, go in and hit edit on your user profile.
Scroll down and give your user a new Nickname that isn’t your login Username. Then, for Display name publicly as change it to your Nickname.

Now Scroll down to the bottom and hit Update Profile.
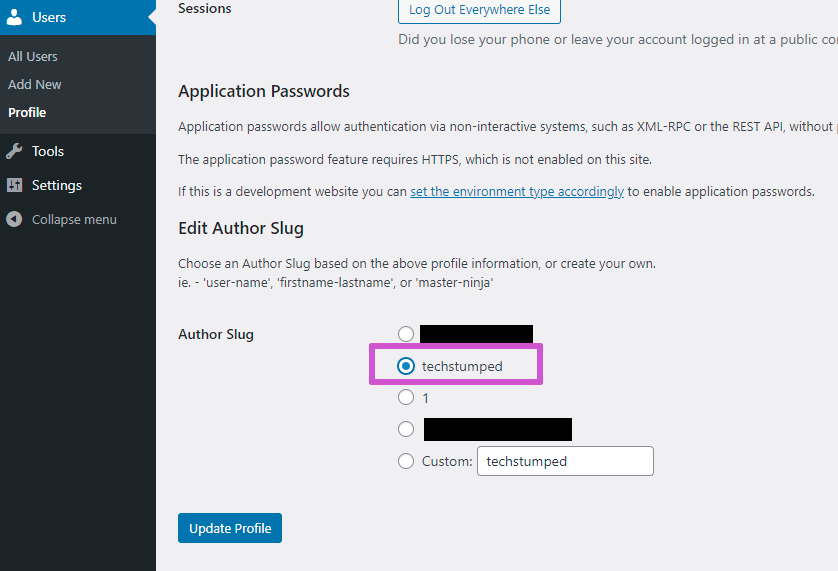
Then, you will need to scroll to the bottom again and change the section titled Edit Author Slug, this was added by our new plugin. Change the Author Slug to your Nickname from the list of options, or type in a custom one if you want. Then hit Update Profile at the bottom again.
Now our main login username is hidden from the public eye. Just remember to change that every time you add a new user!
Adding an SSL Certificate
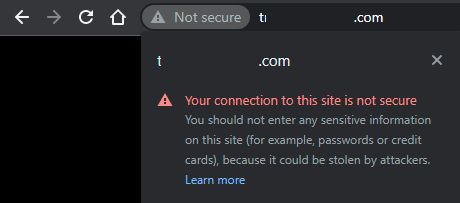
Have you ever tried to visit a website and your browser gives you a big warning that the site is not secure? This is likely because they don’t have an SSL Certificate set up, or it’s set up wrong. Some browsers will show a little padlock next to the URL if the website is secure.
This is what we are aiming for:
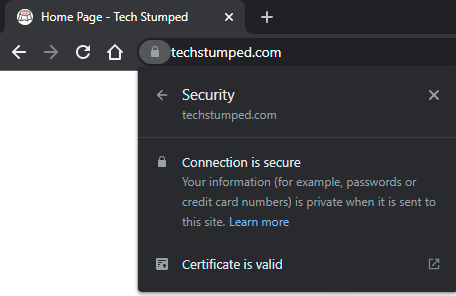
An SSL Certificate lets your website encrypt its traffic and your URL will start with https instead of just http, the s is for secure.
Right now your website probably looks like this on Google Chrome:
Good hosting companies provide free SSL Certificates. They should be pretty easy to turn on.
One of the reasons we ditched our old hosting company was because they would not let us set up any free SSL Certificates. They only let us use the ones they were selling.
A Good Website Hosting Company?
Our recommendation for a good hosting company is DreamHost. We’ve been hosting websites with them for over 5 years, including TechStumped, so you know we really mean what we say.
Full disclosure, this site contains DreamHost affiliate links. This means we may earn a commission if you purchase DreamHost services through our links, without any extra cost to you. This commission helps us keep the site running. Thank you for your support!
If you want to sign up for DreamHost website hosting you can do so here.
If you want to more reasons why we like and recommend DreamHost, we wrote a little about it over in the Hosting Setup section of the How to Setup a WordPress Website from Scratch Guide (here).
Add Free Let’s Encrypt SSL Certificate
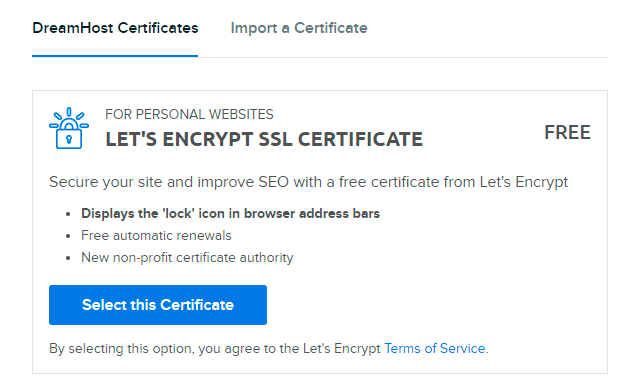
We’ll show you how to get a free Let’s Encrypt SSL / TLS Certificate at DreamHost. If you’re with a different hosting company they should have a similar process.
In DreamHost, from the left-hand menu, go to Websites -> Manage Websites and under your domain hit Manage then scroll down to the Security section. On the SSL/TLS Certificate option click Add.
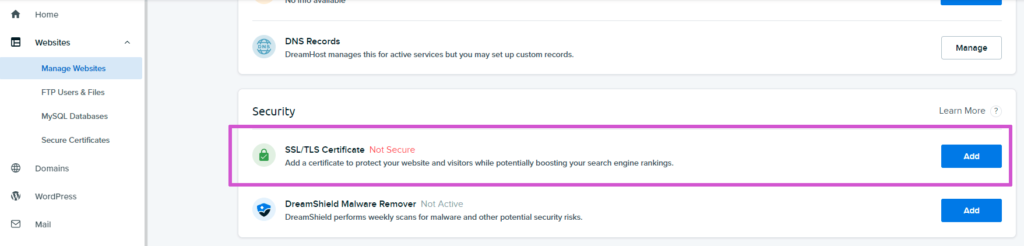
From the next page you can select the free Let’s Encrypt certificate. Or pay for a Sectigo DV Certificate if you prefer.
It can take up to 15 minutes for it to get installed.
When it has finished installing you will be logged out of your WordPress website and have to log back in.
You should now see the little padlock if your browser supports it. If not, check that your address bar says https not http. You may need to clear your browsers cache.
To make sure all our visitors are forced to access our site through the new secure https protocol we will add some more hardening tricks next.
Change WordPress Address to https
Warning! Do not complete this next step if you do not have an SSL Certificate successfully installed. Without that certificate, this step will probably make your website completely inaccessible. Your hosting company’s support should be able to fix this if you run into trouble.
On the left menu go to Settings, and then under General, the 3rd and 4th options are WordPress Address (URL) and Site Address (URL); change both of these from http:// to https:// by adding the s. Scroll to the bottom and click Save Changes.
You will be logged out of WordPress again.

Log back in and it should say Settings Saved at the top.
SFTP or FTP File Access
For the next two security updates you will need SFTP or FTP access to your websites files.
SFTP or FTP is just a way to directly access the files on your hosting server. It is just like using Dropbox or Google Drive to store some files and photos in the cloud.
The simplest way to manage your files is to see if your hosting company provides online access to them.
If your hosting company doesn’t have online FTP access you will need to set up an SFTP / FTP client application. We recommend FileZilla, a very popular, free, opensource program you can install and set up easily. You can download it from: https://filezilla-project.org/download.php Most hosting companies will have instructions on how to set up FileZilla with their servers and hosting accounts.
On DreamHost, the online FTP access is under the Websites -> FTP Users & Files section on the left-hand menu. From here you can hit the Manage Files button beside your websites SFTP user account.
Force HTPPS on WordPress login page
Warning! Only do this if your SSL certificate is up and working!
To force our login page to always use SSL we can go and edit our wp-config.php file.
It is best practice to go and download the wp-config.php file from your SFTP website access anytime you want to modify it. This is because WordPress, your hosting company, or a plugin might have modified it since you last uploaded it. If you change your old copy and upload it then it would be missing these other updates and could break the site.
Go to your SFTP or FTP account and download the wp-config.php file. Make a copy as a backup just in case.
Open it in notepad. Then scroll down and find these lines:
/* Add any custom values between this line and the "stop editing" line. */

/* That's all, stop editing! Happy publishing. */
Next, copy and paste this code in between them:
/**
 *Force HTPPS on the WordPress login page
 *
 */
 define('FORCE_SSL_ADMIN', true);
So, you should have:
/* Add any custom values between this line and the "stop editing" line. */

/**
 *Force HTPPS on the admin login page
 *
 */
 define('FORCE_SSL_ADMIN', true);

/* That's all, stop editing! Happy publishing. */
Okay, that’s the only change. Save the file and upload it back to your website. The SFTP file manager should ask you if you want to overwrite the old copy; say yes.
You can check nothing broke by logging out of WordPress and then back in.
HTaccess force WordPress Https
Warning! This is only if your hosting server is running Apache, like a DreamHost shared hosting account does. If you’re not sure, check with your hosting provider.
Also, only do this if your SSL certificate is up and working!
As a final cementing of our website’s security padlock, we can add some rules to the .htaccess file.
From your SFTP file access download the .htaccess file, it’s at the same level the wp-config.php file lives in. If you can’t find it then your system might be hiding hidden files.
Save a copy of this as a backup.
Then edit the file with notepad. If you haven’t added any plugins or done much with your website yet then your .htaccess file should look something like this:
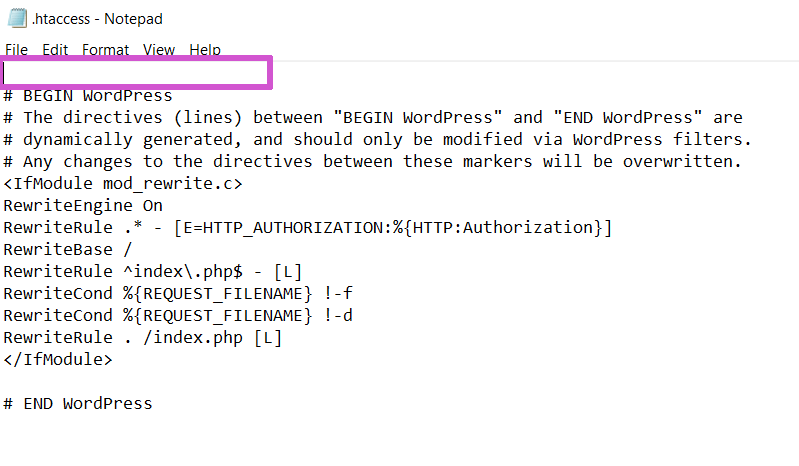
Add a few empty lines ABOVE the line that says #BEGIN WordPress then paste in this code above that. Make sure to update the YOURDOMAIN in both places with your website URL (we would put techstumped). Also, change the .com if you’re website has a different TLD (.net .org etc.). Leave the \ between the two though. Finally, if you’re not forcing the www. part change that on the RewriteRule line.
# My Custom Rules
#
RewriteEngine On
##force HTTPS##
RewriteCond %{HTTP_HOST} YOURDOMAIN\.com [NC]
RewriteCond %{SERVER_PORT} 80
RewriteRule ^(.*)$ https://www.YOURDOMAIN.com/$1 [R,L]

# Really force https
<IfModule mod_headers.c>
Header always set Strict-Transport-Security "max-age=31536000; includeSubDomains" env=HTTPS
</IfModule>
All In One WP Security & Firewall (AIOWPS) – WordPress Plugin
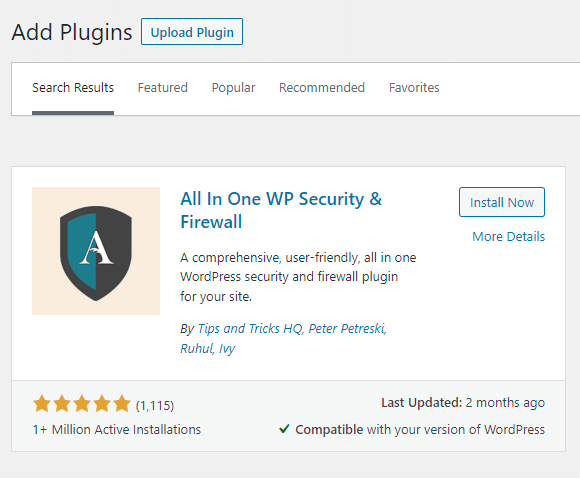
Let’s add a WordPress security and firewall plugin. From the left-side menu click on Plugins and then Add New. From the top right search for All In One WP Security & Firewall and Install and then Activate the plugin by Tips and Tricks HQ, Peter Petreski, Ruhul, Ivy
Near the bottom of your main WordPress left menu should be a new option called WP Security.
If you’ve been following this guide and our previous Install WordPress from Scratch Guide, you should already have 30 points on their dashboard.

The All In One WP Security & Firewall plugin has a lot of settings but it does a good job of telling you what everything is. This will only be a brief setup guide to get you started.
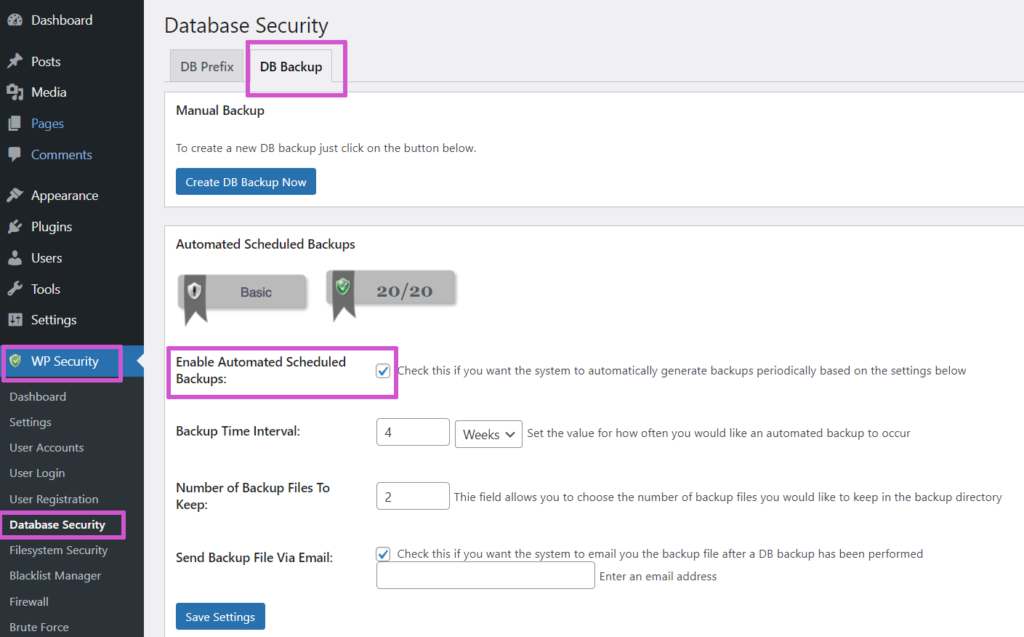
The first 2 items in each list will be the left-hand menu selections, then most sections have tabs along the top so this will usually be the 3rd selection. Then we’ll work down the page of options. We will only list options we suggest you change from the default config.
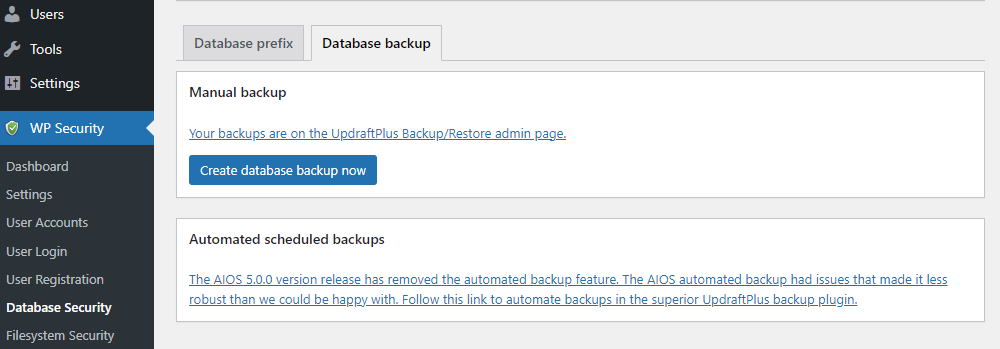
Editor’s Note: the image below is a setting that’s been changed by the plugin recently, but the screenshot still illustrates the explanation of our instructions formatting!
For example: WP Security -> Database Security -> DB Backup -> Enable Automated Scheduled Backups: turn on – will correspond to this button being checked:
It’s important to know that not every security setting is appropriate or useful for every kind of website. We do not need to get a full 500+ points to have a secure setup.
Some of the available settings might even break some of your pages or your entire site. This can be for various reasons including the way your hosting company has configured their servers, the plugins you installed, and the settings you use on various other parts of your website.
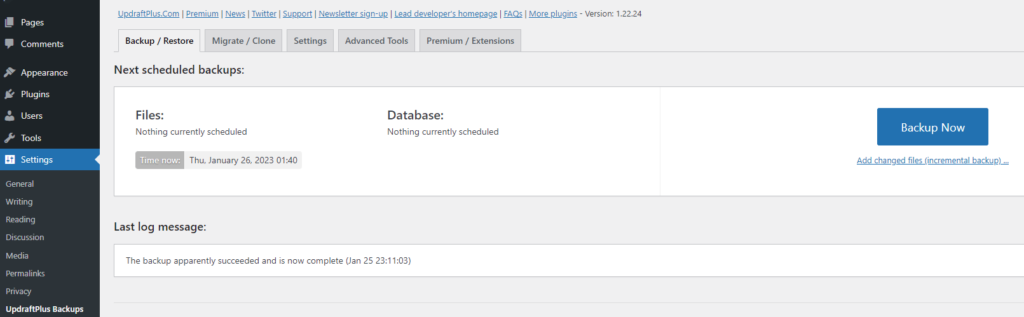
Before you begin it’s a good idea to backup your database. As we just saw this used to be done in this plugin, but now they recommend using the UpdraftPlus plugin (which we were already recommending) – see the details at the bottom of this post by clicking here.
From the UpdraftPlus Backups plugin, you can configure it to automatically send backups to various cloud accounts like Google Drive, Dropbox, etc. Do this, and then hit the big Backup Now button.
Create Important Backups
Next, you should download a backup of the wp-config.php and .htaccess files from your SFTP access.
If you prefer, the plugin also has a way to download these files for backup via:
WP Security -> Settings ->.htaccess File -> Backup .htaccess File
And, WP Security -> Settings ->wp-config.php File -> Backup wp-config.php File
In Case of Errors
If our WP Security settings cause something to go wrong with your site, you can start by undoing the last settings you changed. If that doesn’t work, try disabling the plug in all together from the Plugins section.
If your site is so broken that you can’t access the back end, then the next step is to go into your SFTP access and navigate into this folder: yourdomain.com/wp-content/plugins and change the name of the plugin’s folder, in this case: all-in-one-wp-security-and-firewall You can change it to anything, but we like to just add the word disable at the front.
Now you should be able to log back into your site and remove the plugin or re-enable it and fix your mistake. Renaming the plugin folder means WordPress can’t find the files anymore so it will set the plugin to disabled. Once it’s disabled you can put the folder name back to the correct name and WordPress will keep it disabled until you go to the Plugins menu and delete or activate it again.
You can usually activate it again, and then go back to the WP Security settings and undo the last few changes you made before testing if your site is working again. If that doesn’t work, try uploading your backup copies of the wp-config.php and .htaccess files to reset them back to where you started. WP Security will add a lot of rules to the .htaccess file.
Okay with the backup and recovery details out of the way we can finally start turning on lots of security features.
Google reCAPTCHA
First, you should setup a Google reCAPTCHA account. Those security things that ask you if you’re a robot. You can set up your account here: https://www.google.com/recaptcha/admin
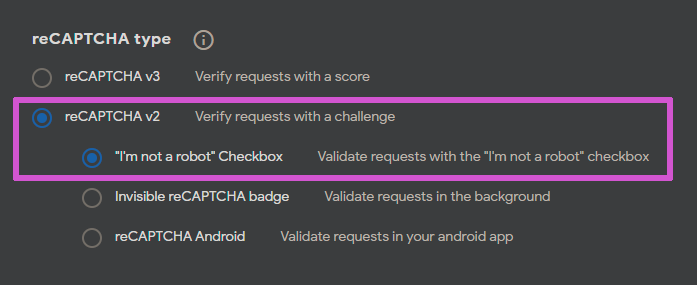
Set up a v2 reCAPTCHA for your website, we suggest the “I’m not a robot” checkbox.
You should get to a page that lists your Site Key and your Secret Key
- Go to WP Security -> Brute Force -> CAPTCHA settings -> Default CAPTCHA: From the dropdown menu choose: Google reCAPTCHA V2
Then copy your Keys over from the Google reCAPTCHA web page.
Check off the other 3 boxes on the page:
- Enable Captcha On Login Page: turn on
- Enable Captcha On Lost Password Page: turn on
- Enable Captcha On Custom Login Form: turn on
Hit the Save Settings button at the bottom.
Recommend WP Security Settings
We suggest you read the built in explanations and warnings on all of these settings to understand what you are turning on. You don’t need to follow all our recommendations if you don’t like one of the features.
Along with the settings we’ve already applied, here are our preferred basic security settings for the WordPress – All in One WP Security & Firewall plugin:
Remember! You need to hit the Save Settings button at the bottom of each panel after changing the settings.
- Wp Security -> Settings -> WP Version Info -> WP Generator Meta Info: turn on
- WP Security -> User Login -> Login Lockdown -> Enable Login Lockdown Feature: turn on
- WP Security -> User Login -> Login Lockdown -> Display Generic Error Message: turn on
- WP Security -> User Login -> Login Lockdown -> Instantly Lockout Specific Usernames:
- We recommend you add what ever your user nickname is that we set with the Hide Author Slug plugin above.
- Also, you should add the following, as they are the most typical hacker guesses:
Admin
Administrator
Root
User
Home- WP Security -> User Login -> Login Lockdown -> Notify By Email: turn on
- WP Security -> User Login -> Failed Login Records – will show you any failed login attempts and what Username they tried to use. If something keeps popping up there you can add it to the list in #10 above.
- WP Security -> User Registration -> Manual Approval -> Enable manual approval of new registrations: turn on
- WP Security -> User Registration -> Registration Captcha -> Enable Captcha On Registration Page: turn on
- WP Security -> Filesystem Security -> File Permissions -> check the right-hand column for any buttons that say Set Recommended Permissions (it’s probably just the wp-config.php file and you can hit the button to let the plugin make this change)
- WP Security -> Filesystem Security -> WP File Access -> Prevent Access to WP Default Install Files: turn on
- WP Security -> Firewall -> Basic Firewall Rules -> Enable Basic Firewall Protection: turn on
- WP Security -> Firewall -> Basic Firewall Rules -> Completely Block Access To XMLRPC: turn on
- WP Security -> Firewall -> Basic Firewall Rules -> Disable Pingback Functionality From XMLRPC: turn on
- WP Security -> Firewall -> Basic Firewall Rules -> Block Access to debug.log File: turn on
- WP Security -> Firewall -> 6G Blacklist Firewall Rules -> Enable 6G Firewall Protection: turn on
- WP Security -> Firewall -> Internet Bots -> Block Fake Googlebots: turn on
- WP Security -> Firewall -> Prevent Hotlinks -> Prevent Image Hotlinking: turn on
- WP Security -> Firewall -> 404 Detection -> Enable 404 IP Detection and Lockout: turn on
- WP Security -> Brute Force -> Honeypot -> Enable Honeypot On Login Page: turn on
- WP Security -> SPAM Prevention -> Comment SPAM -> Enable Captcha On Comment Forms: turn on
- WP Security -> SPAM Prevention -> Comment SPAM -> Block Spambots From Posting Comments: turn on
- WP Security -> SPAM Prevention -> Comment SPAM IP Monitoring -> Enable Auto Block of SPAM Comment IPs: turn on
- WP Security -> SPAM Prevention -> Comment SPAM IP Monitoring -> Minimum number of SPAM Comment IPs: 5
- WP Security -> Miscellaneous -> Users Enumeration -> Disable Users Enumeration: turn on
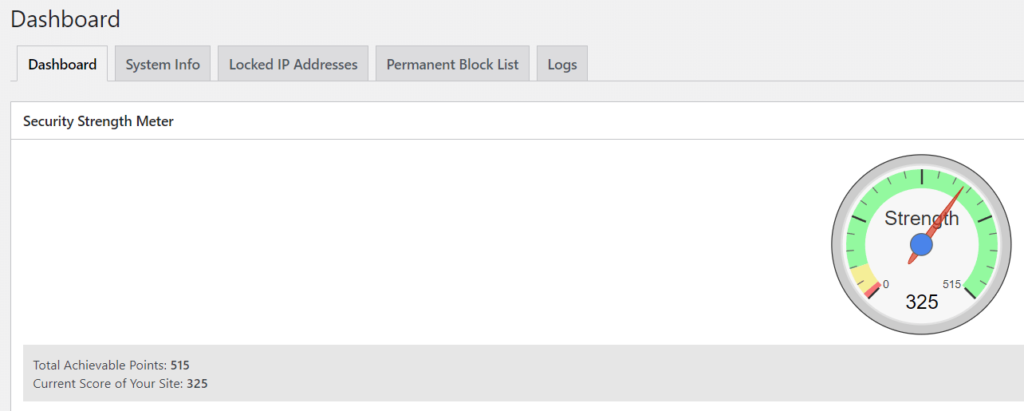
Now on the WP Security -> Dashboard you should have a score of about 315.
That’s pretty good but there’s one more setting we really should turn on.
Hide the WordPress Login page
We set a strong login password, and we hid our login username and slug so the hacker bots have to guess both of them, not just the password. This is a start, but what if we hide the whole login page? They won’t even know where to start!
We did a security update recently for a popular site and when we checked the WP Security -> User Login -> Failed Login Records they were getting hit by hundreds of login attempts every hour. The bots were trying everything to get in. Luckily, they had implemented all the settings we have already so the bots were guessing the wrong things and getting locked out.
When we added this next tip to hide the login page all together, the hacker bot login attempts went from hundreds per hour to ZERO. Not a single attempted login from a hacker bot in months. They can’t find the login screen!
Head back to WP Security -> Brute Force -> the first tab is Rename Login Page. Now it’s time for you to read all the instructions and warnings on this page.
If you’re satisfied, turn on Enable Rename Login Page Feature: and set a Login Page URL that no one will be able to guess.
Log out and check that your new page works. You can also check that the default login page all the bots will try to reach doesn’t work anymore. Remember, it was yourdomain.com/wp-login.php or yourdomain.com/wp-admin if you prefer.
Note: if you need to disable this plugin for some reason (like debugging an error) your login page will return to the default URL as long as the plugin is turned off.
That would bring your dashboard score to 325 if you decided to copy every setting.
All done. Your new WordPress website is installed and setup with a good level of security. Now you’re ready to conquer the internet!
Other Plugin Suggestions
We have 2 more free plugin suggestions you might want to consider:
1) Antispam Bee by pluginkollektiv
It is a powerful plugin to block comment spam on your posts. The settings are fairly easy to understand (there’s only 1 page of them). A comment spam blocker is a necessity for any website that is going to allow comments on their posts.
2) UpdraftPlus WordPress Backup Plugin by UpdraftPlus.Com, DavidAnderson
This free plugin will let you schedule full site backups and link it to various cloud storage systems to automatically save your backups in your personal storage accounts. That way you have your website files safely stored in case something ever goes wrong with your live server or site.

Thanks for reading! Feel free to leave your thoughts and questions in the comments below.
Happy website building!